

Customize Oversized Streetwear for Better Fit
Table of Contents
- Understanding Oversized Fit vs. Poorly Fitted Clothes
- How to Make Oversized Clothes Fit Better: The Foundation
- How to Tailor an Oversized T-Shirt: Sewing Methods
- No-Sew Clothing Alterations for Quick Fixes
- Streetwear Outfit Proportions: Balancing Volume
- Fabric Considerations and Alteration Risks
- Common Mistakes to Avoid When Customizing Streetwear
- Conclusion
- Frequently Asked Questions
Last Updated: October 15, 2026
Understanding Oversized Fit vs. Poorly Fitted Clothes
The difference between intentional oversized fit and a garment that simply doesn't fit comes down to proportion.
When you customize oversized streetwear for better fit, you're refining the design, not fighting it. Keep the relaxed silhouette while eliminating excess fabric that creates bulk or throws off your proportions.
At Hot Takes Designs, we understand that streetwear isn't about perfect tailoring. Whether it's a heavyweight graphic tee or an oversized hoodie, customization is about finding the sweet spot between loose and structured.

Why Oversized Streetwear Dominates Right Now
Oversized clothing is the default for contemporary streetwear. It works for layering, reads as confident rather than sloppy, and gives you room to move. But oversized doesn't mean "one size fits all", a piece that's oversized on someone 5'10" might swallow someone 5'2" whole.
That's where customization comes in. You're not changing the aesthetic, you're making it work for your body.
How to Make Oversized Clothes Fit Better: The Foundation
The first step in customizing oversized streetwear for better fit is understanding what you're working with. Before you pick up scissors or thread, assess the garment and measure everything, this foundation work prevents costly mistakes.
Assessing Your Current Fit
Try on the piece and identify exactly where it's too loose. Look in a mirror from the front, back, and sides, and mark problem areas with safety pins or fabric tape. Common trouble spots include:
- Shoulder seams that sit too far down your arm
- Side seams that create excess volume at your torso
- Sleeve length that extends past your wrist
- Hem length that hits below your natural waist or thigh
Measuring Before You Alter
Grab a soft measuring tape and write down these key measurements while wearing the oversized piece:
- Shoulder width (from shoulder bone to shoulder bone across the back)
- Chest circumference (around the fullest part of your chest)
- Sleeve length (from the shoulder seam to your wrist bone)
- Torso length (from the base of your neck to your natural waist)
- Hem length (from the shoulder seam to where you want the garment to end)
Now measure a fitted piece you already own and love. The difference tells you exactly how much fabric to remove. Keep these measurements, you'll reference them throughout the process.
How to Tailor an Oversized T-Shirt: Sewing Methods
Sewing alterations give you the most control and the longest-lasting results. With a sewing machine or basic hand-sewing skills, this is the most reliable way to customize oversized streetwear for better fit.
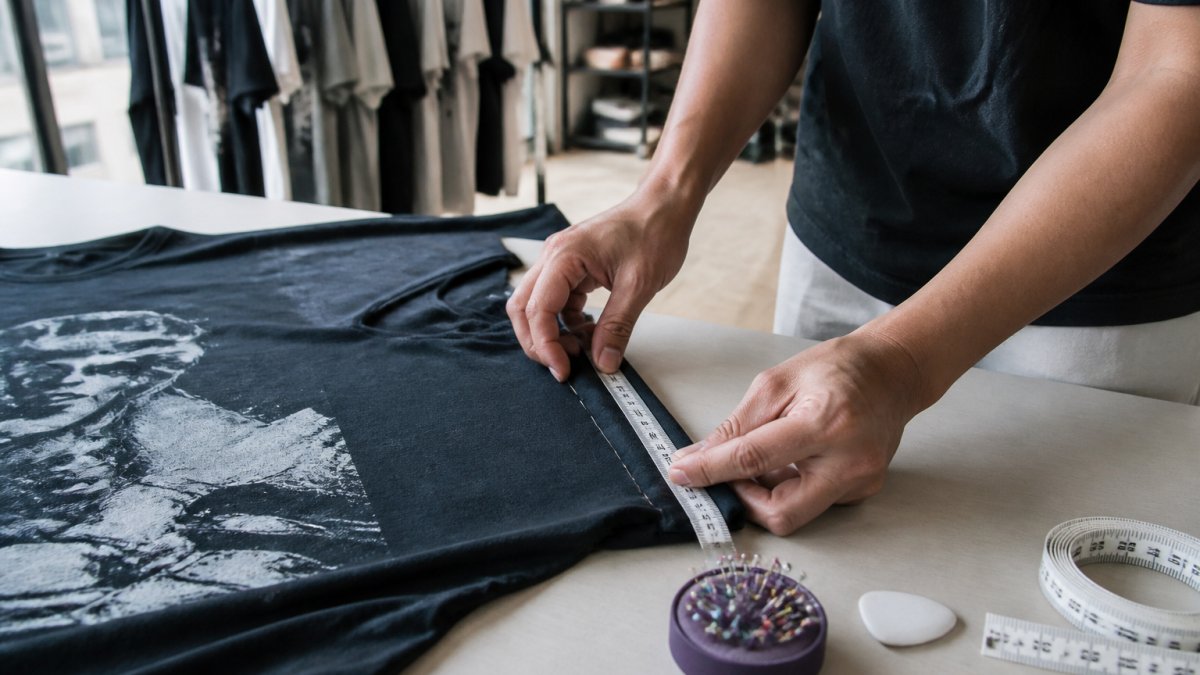
Adjusting Side Seams and Sleeve Length
Side seams are your best friend when customizing oversized pieces. They're forgiving, don't affect the graphic or print, and create a more fitted silhouette without removing too much volume.
Here's the process:
-
Pin the new seam line. Try on the shirt inside-out. Pinch the excess fabric at your sides until the fit feels right, and pin along where the new seam should sit.
-
Mark with chalk or fabric pen. Lay the shirt flat and draw a straight line along your pins. Measure from the armpit to the hem on both sides to confirm symmetry.
-
Sew the new seam. Use a straight stitch, backstitching at the beginning and end. Leave about a quarter-inch seam allowance beyond your stitching line.
-
Try it on. Before trimming, check the fit. If it's good, trim the excess fabric to about half an inch from your new seam.
-
Finish the raw edges. Use a zigzag stitch or serger so they don't fray; a hand whip stitch works fine too.
For sleeve length, the process is similar. Try on the shirt, pinch the sleeve to your desired length, and mark with pins. Sew a new hem line at the cuff and trim excess length.
Hemming and Shortening the Torso
If the piece is too long in the body, hemming is straightforward, especially common with graphic tees and hoodies that sit past your natural waist.
The hemming workflow:
-
Determine your desired length. Try on the shirt and mark where you want the hem to hit, usually your natural waist or mid-hip.
-
Measure from the current hem to your mark. Add one inch for seam allowance, that's how much you'll remove.
-
Cut straight across. Lay the shirt flat and mark a straight line with a ruler and fabric pen. Cut along it.
-
Fold and pin the new hem. Fold the cut edge up about half an inch, pinning evenly all the way around.
-
Sew the hem. Use a blind hem stitch for an invisible finish or a straight stitch for a visible detail, keeping tension consistent.
Pinching and Marking Excess Fabric Before Cutting
Never cut fabric without marking exactly where the cut should go. Try on the garment inside-out, pinch excess fabric until the fit feels right, and have someone mark the pinch line with a fabric pen or tailor's chalk. Lay it flat, draw a straight line along the marks, and measure from key points (armpit, waist, hem) to confirm symmetry on both sides.
No-Sew Clothing Alterations for Quick Fixes
No-sew methods won't last as long as stitched alterations, but they work for quick fixes and temporary adjustments, and they're perfect for graphic tees where you want to avoid damaging the print.
Fabric Glue and Hemming Tape Methods
Fabric glue creates a flexible bond without stitching, best for hems and smaller adjustments.
- Fold the excess fabric up to your desired length.
- Apply fabric glue along the fold in a thin, even layer.
- Press firmly and hold for the time on the bottle (usually 30 seconds to a minute).
- Let it cure fully before wearing (usually 24 hours).
Hemming tape is a fusible adhesive strip that bonds fabric with heat, cleaner than glue and neater.
- Fold the fabric to your desired length.
- Cut a piece of tape to fit along the fold.
- Slide the tape between the two layers.
- Press with an iron on medium heat for 10-15 seconds, moving slowly along the tape.
- Let it cool completely before moving the garment.
Both methods work for hems, but they're less effective for side seam adjustments. Use them for quick fixes on graphic tees or pieces you don't want to permanently alter.
Strategic Tucking and Pinning Techniques
Tucking is the fastest way to test fit without commitment, and a legitimate streetwear styling choice.
DWAEKKI" Vintage Oversized Heavyweight Tee | Stray Kids SKZ Stay Fandom →
The front tuck: Tuck the front into your waistband or belt for a cropped silhouette with an oversized back.
The side tuck: Pinch excess fabric at your sides and tuck it behind you, using a belt to hold it.
Use two safety pins per tuck to keep it secure through movement and sitting.
Streetwear Outfit Proportions: Balancing Volume
Customizing oversized streetwear for better fit isn't just about the garment, it's about how you wear it. Proportion is everything, and an oversized top needs balance from your bottoms, shoes, and accessories.
Pairing Oversized Tops with Fitted Bottoms
This is the golden rule of oversized styling: when your top is loose and voluminous, your bottoms should be fitted or tapered.
Best pairings:
- Oversized graphic tee + slim-fit black jeans + chunky sneakers
- Oversized hoodie + fitted cargo pants + boots
- Oversized streetwear tee + tapered trousers + minimal accessories
Fitted bottoms anchor the silhouette and create definition at your lower half, making the oversized top feel intentional rather than accidental.

Avoid oversized tops with baggy bottoms unless you're deliberately going oversized-on-oversized. That works in specific contexts, but it requires careful styling and strong accessories.
Using Accessories and Layering for Structure
Accessories add structure to an oversized silhouette, breaking up the volume and giving your eye places to land.
Effective accessories for oversized fits:
- Belts define your waist and add intentionality. A wide belt or chain belt works especially well.
- Layering pieces like light jackets or flannel shirts add texture and proportion. Layer an oversized tee under a fitted denim jacket or button-up.
- Bags ground an outfit. A structured handbag, crossbody bag, or belt bag adds visual weight and balance.
- Statement jewelry draws attention upward or outward. Chunky chains, bold earrings, or layered necklaces add personality.
- Hats complete the silhouette. A baseball cap or beanie adds proportion to your head and shoulders.
Layering is especially powerful: an oversized graphic tee under a fitted flannel or light jacket creates multiple silhouettes, with the fitted layer adding structure while the oversized piece stays visible.
Fabric Considerations and Alteration Risks
Not all fabrics behave the same way. Before you customize oversized streetwear for better fit, understand what you're working with. Some fabrics shrink, some fray, and some are risky to alter.
Understanding Fabric Weight and Shrinkage
Fabric weight determines how a garment drapes and responds to alterations.
Shrinkage is critical. Cotton shrinks when washed, especially in hot water, and pre-shrunk fabrics shrink less but not zero. Check the care label: if it's pre-shrunk you have more flexibility; if not, account for shrinkage when measuring and cutting.
Polyester blends (like the 80/20 cotton-poly in Hot Takes Designs' hoodies) shrink less than pure cotton and hold their shape better during tailoring.
Protecting Graphic Prints During Alterations
Graphic prints are the heart of streetwear pieces, damage the print and you've damaged the piece.
Sewing near prints: Never sew through a graphic.
Heat and prints: Hemming tape's heat can damage or shift prints.
Washing before alterations: Wash the piece once before altering so shrinkage happens before you measure and cut.
Distressed and vintage finishes: If the piece has a distressed or faded finish (like Hot Takes Designs' vintage-washed tees), be careful sewing near compromised areas.
Common Mistakes to Avoid When Customizing Streetwear
These are the most common errors people make when customizing oversized pieces.
Cutting too much fabric too fast. You can always cut more; you can't add fabric back.
Not measuring both sides equally. Asymmetrical alterations look sloppy.
Altering without trying on first. Pinning, marking, and trying on prevents expensive mistakes.
Overshrinking through aggressive washing. To preshrink, use cold water and lay flat to dry.
Conclusion
Customizing oversized streetwear for better fit is about respecting the design while making it work for your body. Whether you're sewing new side seams, hemming length, or using strategic tucking and accessories, the goal is the same: keep the aesthetic you love while eliminating excess that doesn't serve you.
The best pieces start with quality construction. When you start with a well-made graphic tee or hoodie, your customization work pays off. View all our oversized streetwear styles and find the pieces worth tailoring to perfection.
Frequently Asked Questions
What's the difference between intentional oversized fit and a shirt that's just too big?
Intentional oversized fit has structured drape, balanced proportions at the shoulders, and deliberate length, like the dropped-shoulder construction on our DWAEKKI Vintage Oversized Tee. A shirt that's simply too big sags unevenly, bunches at the waist, and lacks shape. Check if the shoulder seam sits where your shoulder ends; if it extends 2+ inches past, the fit is accidental rather than designed.
Can I tailor an oversized hoodie without ruining its shape and structure?
Yes, if you work carefully. Adjust side seams gradually, removing only 0.5 inches per side at a time. Avoid cutting into the construction or ribbing. Heavyweight hoodies like our 10 oz./yd² fleece hold their shape better than lighter fabrics, so alterations are more forgiving. Always pin and try on before sewing to ensure the silhouette stays intact.
What are easy no-sew ways to adjust oversized clothes for events like concerts?
Fabric glue and hemming tape work for temporary adjustments on hems and cuffs. Strategic tucking at the side seams or back creates a fitted look without altering the garment. Pinning excess fabric inside the shirt and securing with safety pins is reversible and concert-ready. For a K-Pop concert outfit, layer an oversized graphic tee over a fitted long-sleeve to create instant proportion balance without any alterations.
How should streetwear proportions look when wearing an oversized top?
Pair oversized tops with fitted or tapered bottoms to create visual balance. If your top is baggy through the torso, wear slim-fit cargo pants or straight-leg jeans. Layer a light jacket or flannel over the oversized piece to add structure. Accessories like belts, chunky sneakers, or a statement bag anchor the silhouette and prevent the outfit from looking shapeless. The goal is intentional contrast, not drowning in fabric.