

How to Shrink a Graphic Tee Without Ruining the Design
Table of Contents
- How to Shrink a Cotton T-Shirt Without Destroying the Graphic
- Why Cotton Shrinks and What That Means for Your Print
- Can You Shrink a 60% Cotton 40% Polyester Shirt? What Actually Happens
- How to Make an Oversized T-Shirt Smaller Without Shrinking the Whole Thing
- How to Wash Graphic Tees Without Cracking the Print
- Step-by-Step: How to Shrink a Graphic Tee With Boiling Water
- Fabric-by-Fabric Shrinkage Guide: What Actually Works
- How to Identify Your Graphic's Ink Type Before You Shrink
- Can You Undo Shrinkage? Reversibility and Damage Control
- Frequently Asked Questions
Last Updated: October 6, 2026
How to Shrink a Cotton T-Shirt Without Destroying the Graphic
Learning how to shrink a graphic tee without ruining the design comes down to heat, moisture, and one thing most guides skip: the ink.
At Hot Takes Designs, we print on 100% cotton tees with DTF graphics, so we deal with this constantly.

**Shrinkage is not a defect. According to the American Cleaning Institute's fabric care guidance, heat and moisture are the two biggest drivers of fiber contraction in natural fabrics.
Why Cotton Shrinks and What That Means for Your Print
Cotton shrinks because its fibers pull tighter when exposed to heat and water. That contraction is permanent and fastest in the first wash.
Here is what matters for your graphic:
- Natural fibers contract. Cotton and other plant-based fibers shrink the most.
- Synthetic blends resist. Polyester holds its size and pulls cotton along with it.
- The print sits on top. Your ink does not shrink at the same rate as the fabric under it.
That last point is the whole ballgame: a shirt that shrinks fine can still lose its design.
Can You Shrink a 60% Cotton 40% Polyester Shirt? What Actually Happens
A 60% cotton 40% polyester shirt will shrink, but far less than a 100% cotton tee. Polyester does not contract with heat, so with 40% of the fabric locked in place, the cotton has less room to pull. Expect a slightly closer fit through the body, minimal change in length, and almost no change in the sleeves. If you need a real size down, a blend will disappoint; if you just want to take up slack, it works fine.
How to Make an Oversized T-Shirt Smaller Without Shrinking the Whole Thing
You can make an oversized t-shirt smaller without shrinking the whole thing by targeting specific areas. Full-garment shrinking is a blunt tool. Spot shrinking is a scalpel.

This is the move for anyone who loves the length but hates the width, or the reverse.
For a boxy tee that is too wide:
- Soak just the side seams in hot water using a spray bottle.
- Work the wet fabric with your hands to encourage contraction.
- Tumble dry low and check the fit every few minutes.
For a tee that is too long:
- Mist the bottom hem and lower body with hot water.
- Press with a steam iron, holding it a few inches above the fabric.
- Air dry, then recheck.
Steam ironing is underrated: direct steam relaxes fibers in one spot, giving you control instead of a guessing game.
How to Wash Graphic Tees Without Cracking the Print
Washing graphic tees without cracking the print means cold water, inside-out washing, and a low dryer setting. Get those three right and most prints outlast the shirt.

Inside-Out Washing and Cold Water Rinses
Turn the shirt inside out before it hits the machine, so the graphic rubs against itself instead of the drum and other clothes.
- Cold water rinse keeps fibers from contracting mid-wash.
- Gentle cycle cuts the agitation that grinds ink into the fabric.
- Mild detergent avoids harsh chemicals that break down plastisol ink.
Wash with similar colors and avoid overloading the drum, friction peels prints.
Dryer Settings That Won't Kill Your Graphic
Low heat or air dry, every time. High heat is the number one killer of screen print and DTF graphics.
If you must use the dryer, choose the lowest setting and pull the shirt out while it is still slightly damp. The FTC's care label rules require garments to carry care instructions for a reason: following them is what keeps the print alive.
Here is how heat settings stack up:
| Setting | Effect on Fabric | Effect on Graphic | Verdict |
|---|---|---|---|
| Cold wash | Minimal shrinkage | Safe | Best for routine care |
| Warm wash | Light shrinkage | Low risk | Fine for cotton |
| Hot wash | Strong shrinkage | Cracking risk | Only for shrinking |
| Air dry | No shrinkage | Safe | Best for prints |
| Low tumble dry | Light shrinkage | Low risk | Acceptable |
| High heat dry | Strong shrinkage | Delamination risk | Avoid |
Step-by-Step: How to Shrink a Graphic Tee With Boiling Water
Boiling water is the fastest way to shrink a 100% cotton graphic tee, but also the riskiest for the print.
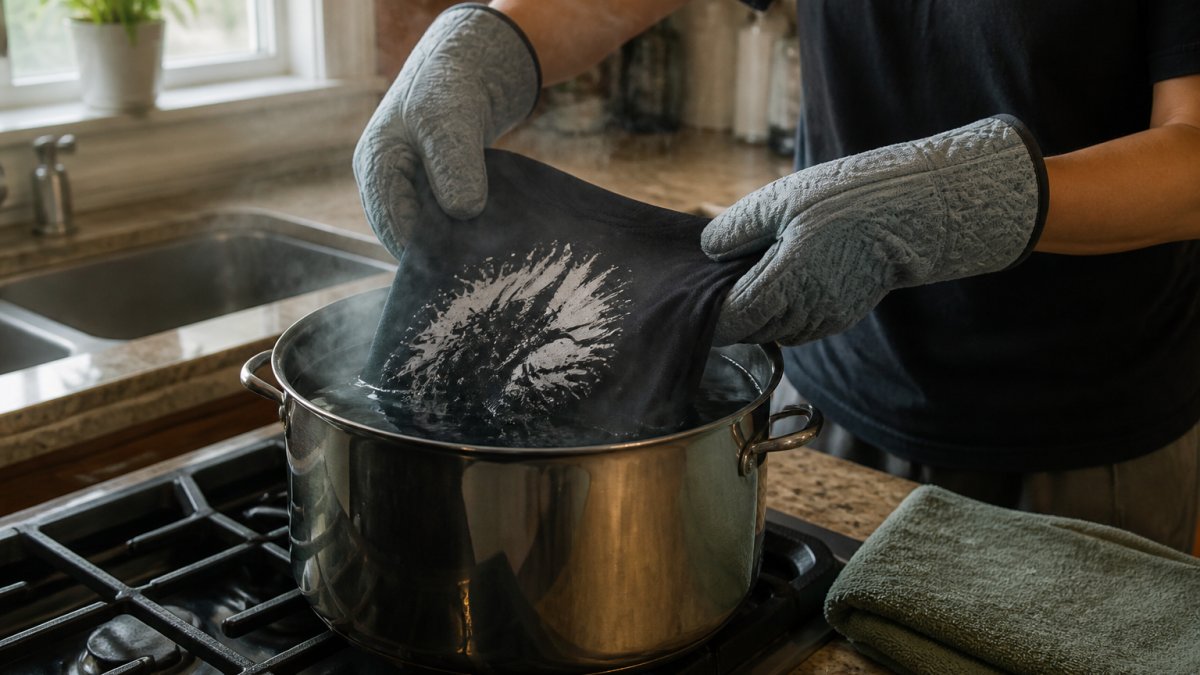
Total time: 30 to 45 minutes Difficulty: Beginner, but pay attention Shrinkage you can expect: Roughly one-half to one full size on 100% cotton, mostly in length and body width.
What you'll need:
- A large pot of water (enough to fully submerge the shirt)
- Tongs or heat-safe gloves
- A clean towel
The steps:
- Turn the shirt inside out to shield the print.
- Bring the water to a rolling boil, then cut the heat. Let it settle for 30 seconds so it stops churning.
- Submerge the shirt fully and hold it under for 5 to 10 minutes. Use tongs to keep it from floating.
- Pull it out with tongs and let it cool slightly on a towel.
- Rinse in cold water to lock in the new size. The cold shock sets the contracted fibers.
- Tumble dry low or air dry, checking the fit as it dries. Pull it out while slightly damp if you want to stop shrinkage early.
Expected result: A noticeably tighter fit, mostly in length and body width.
Risk vs. Reward: When Boiling Is Worth It
Boiling water gives the strongest, fastest contraction of any home method, but puts the most stress on the print. The trade-off:
| Situation | Boiling Worth It? | Why |
|---|---|---|
| 100% cotton, shirt is one size too big | Yes | Ink tolerates short heat exposure; you get a real size drop |
| 100% cotton, water-based or DTG print | Risky | These inks are thinner and fade or crack faster under heat |
| 100% cotton, DTF print | Risky | The adhesive layer is the weak point; short soaks only |
| Cotton/poly blend | No | Polyester will not contract; you risk the print for almost no gain |
| Pre-shrunk cotton | Marginal | The fabric has already been contracted; results are small |
| Vintage or thrifted tee with an unknown print | No | You cannot verify the ink; assume it is fragile |
If your shirt lands in a "No" or "Risky" row, drop to the warm-wash and low-dry method instead: less shrinkage, but you keep the design.
Stray Kids SKZOO Double-Sided DTF 100% Cotton T-Shirt →
Safety Precautions for Boiling Water Submersion
Boiling water submersion carries real burn risk, so treat it like any hot-water task in the kitchen.
- Never drop the shirt in with your bare hands.
- Keep the pot on a flat, stable burner, and turn the handle away from the edge.
- Keep kids and pets out of the kitchen while you work.
Fabric-by-Fabric Shrinkage Guide: What Actually Works
Shrinkage potential depends almost entirely on fiber content. How common tee fabrics behave:
| Fabric | Shrinkage Potential | Best Method | Watch Out For |
|---|---|---|---|
| 100% cotton | High | Boiling water or hot wash | Print cracking |
| Cotton/poly blend | Low | Warm wash, low dry | Minimal results |
| Tri-blend | Low | Cold wash only | Distortion |
| 100% polyester | None | Not applicable | Heat damage |
| Pre-shrunk cotton | Very low | Warm wash | Almost no change |
Pre-shrunk cotton is the wild card here. If the manufacturer already ran the fabric through a shrink process, you are fighting an uphill battle. Our pre-shrunk heavyweight cotton tees are built to hold their size, so they will not move much no matter what you do.
How to Identify Your Graphic's Ink Type Before You Shrink
Identifying your ink type before you shrink is the single most important step, and the one almost nobody does. Different inks respond to heat differently, and the wrong method turns a fitted tee into a cracked one. Here is how the four common print types behave, how to tell them apart, and what heat does to each.
Plastisol Ink (Most Common Screen Print)
How to identify it: Run your finger over the design.
How it reacts to heat: Plastisol is the most heat-tolerant common ink. It softens rather than melts at home temperatures, so a short boil or hot wash is usually survivable.
Best method: Hot wash or a short boil, then low dry. Avoid stretching the shirt while hot, when plastisol is most likely to crack.
Water-Based Ink
How to identify it: Water-based ink soaks into the fabric instead of sitting on top. The print feels soft, almost like part of the shirt, with no raised edge.
How it reacts to heat: Water-based ink is more delicate. High heat fades it and breaks down the binder holding pigment to fibers.
Best method: Warm wash, low dry. Skip the boil, less shrinkage, but you keep the color.
DTF (Direct to Film) Prints
How to identify it: DTF prints have a slightly plastic feel and often show fine detail and full-color gradients that screen printing struggles with.
How it reacts to heat: The film handles heat reasonably well, but the adhesive bonding it to the fabric is the weak point.
Best method: Short hot exposure only, or warm wash and low dry. Never leave a DTF print in hot water more than a few minutes.
DTG (Direct to Garment) Prints
How to identify it: DTG prints look and feel similar to water-based screen prints because the ink is sprayed directly into the fabric.
How it reacts to heat: DTG ink sits in the fibers, so it moves with the fabric and is less prone to cracking than plastisol. It is still sensitive to heat and abrasion, and high heat dulls colors and weakens the bond.
Best method: Warm wash, low dry. Treat it like water-based ink.
A Quick Field Test
If you cannot tell by touch, try this:
- The stretch test. Gently pull the fabric across the design. Plastisol and DTF films resist and may show fine edge cracks; water-based and DTG prints stretch with the fabric.
- The warm iron test. Press a warm iron (with a pressing cloth, never touching the print) near the design and watch for sheen, stickiness, or color shift. A shiny or sticky reaction means heat-sensitive ink, use the gentlest method.
- The light test. Hold the shirt to a light. A raised, opaque layer suggests plastisol or DTF; a print that lets the fabric weave show through suggests water-based or DTG.
Can You Undo Shrinkage? Reversibility and Damage Control
Shrinkage is not reversible. Once cotton fibers contract and the bonds reset, they stay that way, no home method reliably stretches a shirt back to its original size.
What you can do is damage control:
- Stretch while damp. Mist the shirt and gently pull the fabric, then air dry. This buys back a little width.
- Use a steamer. Steam relaxes fibers and can add back a small amount of give.
- Accept the new size. A shrunk tee is still a great tee. Style it as a fitted or cropped look.
For prints that already cracked, there is no fix. Cracking and peeling are permanent. This is why the washing habits in this guide matter more than the shrinking method itself.
Our honest take: if you love the fit of a shirt, do not gamble on it.
Frequently Asked Questions
Will hot water or a dryer damage a graphic tee's design?
Yes, if you're not careful. High heat can cause cracking and peeling. The key is controlling temperature and time. Boiling water submersion for 5-10 minutes can shrink a cotton tee, but longer exposure risks delamination. In the dryer, use low heat and remove the shirt while slightly damp. Always turn the shirt inside out to protect the print from direct heat and agitation.
Can I shrink an XL graphic tee down to a medium?
Realistically, no. Most cotton tees shrink 3-5% in length and 2-4% in width after one hot wash and dry cycle. An XL to medium is roughly a 15-20% size reduction, which is far beyond what shrinkage alone can achieve. You might get an XL down to a large with aggressive boiling and drying, but the fit will be inconsistent. For a two-size drop, a tailor is the safer bet.
Can you shrink a polyester graphic T-shirt?
Polyester and synthetic blends resist shrinking because the fibers are heat-set during manufacturing. A 60% cotton 40% polyester shirt might shrink 1-2% at most, and the polyester content will pull the fabric back toward its original shape. You can try hot water and low tumble drying, but don't expect dramatic results. For synthetic-heavy shirts, getting them tailored is more reliable than trying to shrink them.
How do you shrink a graphic tee without cracking the print?
Turn the shirt inside out before any heat treatment. Use boiling water submersion for no more than 5-10 minutes, then immediately rinse with cold water to stop the process. When drying, use low heat and remove the shirt while it's still slightly damp, then air dry flat. Skip the iron entirely, or if you must iron, use a steam iron on the lowest setting and never press directly on the graphic. This method shrinks the cotton fibers while keeping the print intact.
Shrinking a graphic tee is a gamble, and the house usually wins. If you want a tee that fits right the first time, skip the pot of boiling water. Hot Takes Designs prints every piece to order on ultra-soft fabrics with vibrant, long-lasting prints, in inclusive sizing from 2XS to 6XL. Our custom-printed, cut-and-sewn process means you get the fit you actually want, and the design stays crisp wash after wash. Get started with Hot Takes Designs and wear your fandom without the shrinking anxiety.