

How to Make a DIY K-Pop Iron-On Patch Design
Quick Summary
To make a DIY kpop iron on patch, sketch an original design at its final size, limit the palette to three colors, and mirror it before printing on heat transfer paper. Apply it with a pressing cloth and firm pressure, then let it cool before peeling.
- Collect three references and reduce them to simple silhouettes before drawing.
- Limit your palette to three colors, and use thick outlines so they survive pressing.
- Keep text larger than 1/4 inch and artwork at least 1/8 inch inside the patch edge.
- Mirror your design before printing on transfer paper, or the text will appear backward.
- Use a thin cotton pressing cloth, press firmly without sliding, and wait until cool before peeling.
Table of Contents
- What You Need Before You Start a K-Pop Patch
- Planning a K-Pop Patch Design: Motifs, Colors, and Layout
- Free Patch Design Templates and How to Use Them
- Creating and Preparing Your Patch Artwork
- How to Apply an Iron-On Patch Step by Step
- Troubleshooting Patches That Won't Stick or Peel
- Booking Your Custom Fan Tee or Hoodie Next
- Frequently Asked Questions
What You Need Before You Start a K-Pop Patch
Last Updated: October 29, 2026
Making your own kpop iron on patch is one of the most fun ways to add your bias to a jacket, tote, or hoodie. Many fans start with a rough idea and end up with a patch they wear for years. The good news? You don't need a studio or expensive gear to get started.
Here's the short version: you need a design, a printing or cutting method, a heat source, and a garment that can take heat. That's it. Let's go through each one.
- A clear design file. A sketch, a digital mockup, or a clean template.
- A printing or cutting method. Home printing on heat transfer paper, a print shop, or hand embroidery.
- An iron or heat press. A standard home iron works for most small patches.
- A pressing cloth. Any thin cotton cloth protects both the patch and your garment.
- A test garment scrap. Always test on something you can afford to ruin.
A common mistake is buying supplies before finalizing the design. Sketch your idea first, then match your materials to it. A small, simple motif is much easier to press at home than a large, detailed one.
Planning a K-Pop Patch Design: Motifs, Colors, and Layout
Planning matters more than most beginners expect. A patch that looks great on screen can turn muddy once it's stitched or printed onto fabric. Start by choosing one core idea, then build everything else around it. For K-pop projects, that core idea should come from the fandom rather than from a generic clip-art library.
Turning Fandom Inspiration Into an Original Design
Most K-pop fans already have a mental mood board: a concert lightstick color, a recurring symbol from a music video, a lyric fragment, or a styling detail from a specific era. The trick is to translate that mood into shapes you can actually press onto fabric. A practical workflow looks like this:
- Collect three references, not thirty. Pick one color palette, one symbol, and one short phrase or lettering style. Too many references produce a cluttered patch.
- Reduce each reference to a silhouette. A lightstick becomes a simple rounded shape; a stage prop becomes a bold outline; a lyric becomes a single line of large text.
- Combine the silhouettes into one focal point. Place the symbol in the center, the text along the bottom edge, and the palette as a two- or three-color fill.
- Sketch at actual size. Draw the design at the finished patch size (for example, a 3-inch circle) so you can judge legibility before you commit.
Choosing Colors That Survive Heat and Fabric
Limit your palette to three colors. Four or more often looks cluttered at small sizes, and each additional color adds a transfer step if you are layering vinyl or printable fabric. Choose colors with strong contrast against the garment: dark text on a light patch, or a light outline on a dark patch. Avoid gradients and fine color blends, which tend to band or fade when pressed.
If you are matching a fandom palette, pick the two most recognizable colors and use a neutral (black, white, or cream) as the third. That keeps the connection clear without turning the patch into a color test.
Copyright, Trademarks, and Fan-Made Designs
Fan art is a long tradition, but copying official artwork directly can cause problems if you plan to sell your patches. Group names, logos, album art, and likenesses may be protected by trademark or copyright, and personal-use projects are generally treated differently from commercial ones. A safe approach is to draw your own take on a theme: use the colors, mood, or symbolism the fandom already recognizes, then add your own shapes and lettering. Instead of tracing an album cover, draw a simplified flower or symbol in the group's signature colors. That keeps the connection clear while making the design yours. If you intend to sell, consult the relevant intellectual-property guidance before listing any design that references a group or artist.
Layout Rules That Hold Up on Fabric
- Pick one main motif. A flower, a symbol, or a stylized shape works well.
- Limit your palette to three colors. Four or more often looks cluttered at small sizes.
- Use thick outlines. Thin lines can break apart during pressing.
- Keep text large. Anything smaller than about 1/4 inch is hard to read.
- Leave a margin. Keep artwork at least 1/8 inch inside the patch edge so the border stays clean.
Free Patch Design Templates and How to Use Them
You don't have to start from a blank page. Free patch design templates are a great shortcut, especially for your first project. Search for "iron-on patch template" or "heat transfer template" and you'll find printable outlines in common patch shapes like circles, shields, and rounded rectangles.
Pick a template that matches your target size. Print it at 100 percent scale, then trace or color inside the lines. Digital users can open the template in a design app, add their artwork, and export at high resolution.
Quick template workflow:
- Choose a shape and size, such as a 3-inch circle.
- Place your motif in the center.
- Add one line of text along the bottom edge.
- Export as a high-resolution PNG and mirror it before printing.
Remember to mirror your design before printing on transfer paper. Forgetting this step is one of the most common mistakes, and it leaves text backward on the finished patch.
Creating and Preparing Your Patch Artwork
Once your template is set, it's time to finalize the artwork. Keep edges clean and solid. Avoid tiny dots, fine hairlines, or gradients that won't transfer well. Solid shapes press far more reliably than detailed textures.
"Moth To A Flame, Stan To A Bias" K-Pop Fan Hoodie | Retro Graphic Streetwear →
Here's a simple prep checklist:
- Design is at least 300 DPI for crisp edges
- Design is mirrored if using heat transfer paper
- Outlines are thick enough to survive pressing
- Colors are limited to a clean palette
- Patch size fits the garment area you plan to use
Test your print on scrap fabric before committing to your final garment. This step catches color shifts and size problems early.
How to Apply an Iron-On Patch Step by Step
This is where your patch becomes wearable. Work slowly, and follow each step in order. Most application problems come from rushing.
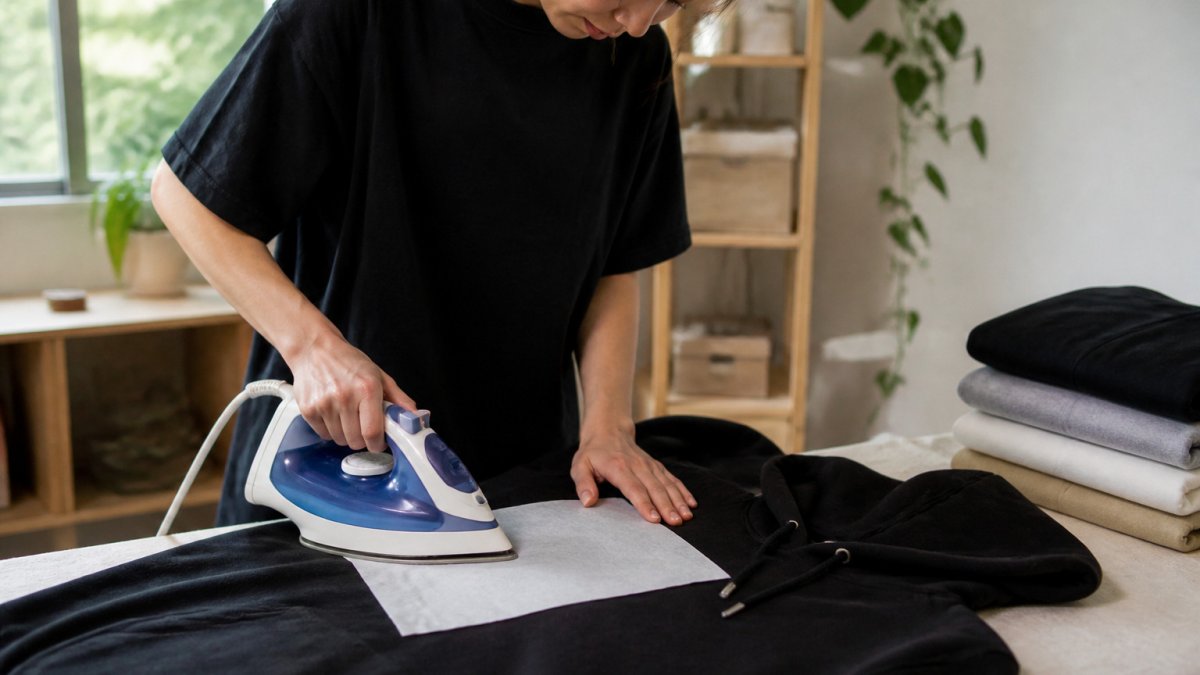
- Prepare the garment. Wash and fully dry the fabric. Lay it flat on a hard, heat-safe surface.
- Position the patch. Place it face-up on the garment, where you want it to sit.
- Cover with a pressing cloth. Use a thin cotton cloth over the entire patch.
- Press with firm pressure. Hold the iron in place. Don't slide it back and forth.
- Let it cool. Wait until the patch is cool before peeling.
- Check the edges. Press any lifted corners again with the cloth in place.
!Hands in a bright home workspace pressing a small iron-on patch onto a black hoodie with a protective cloth laid over it
Iron Temperature and Pressing Time
Always check the product instructions for your specific adhesive before pressing. Test on scrap fabric first to confirm the right time and temperature for your materials.
Watch out: pressing too hot can scorch fabric or melt synthetic blends. Start cooler and increase slowly if needed.
Keep these pressing variables in view as you work through each step, since most application problems trace back to one of them.
| Factor | What to watch | Fix |
|---|---|---|
| Pressing cloth | Protects patch and garment | Use a thin cotton cloth |
| Pressure | Firm, held in place | Press again if edges lift |
| Cooling | Wait until cool | Do not peel while warm |
| Iron heat | Can scorch or melt blends | Start cooler and increase slowly |
| Test | Confirm time and temperature | Test on scrap fabric first |
Troubleshooting Patches That Won't Stick or Peel
Even careful work can go wrong. Here are the most common problems and quick fixes:
- Patch lifts at the edges. Press again with more pressure and a longer hold time.
- Patch peels after washing. The garment may not have reached enough heat. Reapply and extend pressing time.
- Fabric looks scorched. Lower the iron temperature and always use a pressing cloth.
- Print looks faded. Use a higher-quality transfer material and avoid over-pressing.
- Edges curl. Trim any loose threads and press the edges separately.
Most patch failures come down to heat, pressure, or time. Adjust one variable at a time so you can see what fixes the problem.
Booking Your Custom Fan Tee or Hoodie Next
Once you've practiced on scrap fabric, you may want a finished garment to decorate. Browse the K-Pop fan hoodie for a clean canvas for your new patch. A ready-made fan hoodie gives you a clean canvas for your new patch. The "Moth To A Flame, Stan To A Bias" K-Pop Fan Hoodie is a retro graphic pullover built for concert fits and everyday wear.

Frequently Asked Questions
How do I create my own iron-on patches?
Start with a simple design sketched or built digitally at the exact size you want, then print it on heat transfer paper or send it to a printer that makes DTF transfers. Keep fine lines and small dot patterns to a minimum, since thin details often break down when pressed. Cut close to the outline, leave a thin border if the design calls for one, and press it onto your garment following the adhesive manufacturer's temperature and time guidance. A simple two-color design is the easiest first project.
What materials do I need to make a DIY iron-on patch?
You need a design file or printed artwork, heat-transfer paper or a heat-activated adhesive sheet, a household iron or heat press, a flat hard surface, a thin pressing cloth, and sharp scissors. A cutting mat and craft knife make clean edges easier. Check that the transfer material is compatible with your printer type, and test on a scrap of the same fabric before pressing the finished patch onto a garment you plan to wear.
How long should I iron an iron-on patch?
Follow the pressing time printed on your adhesive or transfer product, since most fall in a range that you should not exceed. Use firm, even pressure rather than sliding the iron around, and keep a thin cloth between the iron and the patch. Let the patch cool fully before peeling the carrier sheet, because peeling while warm can lift the design. If the adhesive looks unset, press again for a short additional period instead of pressing longer right away.
Is there a trick to getting an iron-on patch to stay in place?
The most reliable method is to preheat the garment for a few seconds to remove moisture, then press the patch with firm, sustained pressure while covering it with a pressing cloth. Make sure the edges of the patch are fully sealed, since lifted corners are where peeling starts. For high-stress areas such as sleeves or bag straps, add a line of stitching around the perimeter after pressing for extra security.
