

7 Custom K-Pop Lightstick Cover Ideas That Stand Out
Last Updated: October 28, 2026
Quick Summary
Designing custom lightstick covers starts with matching your materials to the lightstick build: hard plastic needs light sanding or a primer wipe, acrylic takes vinyl and decals, and silicone won't bond to glue, so use a fitted cover or strap. Keep decorations thin so the light still glows through, and test every adhesive on a hidden spot first.
- Holographic vinyl is the crowd favorite for acrylic globes because it catches stage lights.
- Superglue and acetone-based cleaners fog acrylic and can crack thin plastic, so keep both away.
- A standard crochet cover runs roughly 40 to 48 stitches around in worsted-weight cotton on a 4.0 mm hook.
- PETG is the better default filament for concert-day 3D printed add-ons than PLA.
- Leave 0.2 to 0.3 mm of clearance on any snap-fit or press-fit 3D printed joint.
Table of Contents
- Start With the Right Base: Lightstick Models and Material Compatibility
- DIY K-Pop Lightstick Decoration Ideas That Actually Hold Up
- Best Adhesives for Lightstick Crafts (and What to Avoid)
- Crochet Lightstick Cover Patterns for a Handmade Look
- Bows, Ribbon Accents, and 3D Printed Components
- Step-by-Step Assembly for Beginners
- Concert Safety, Transport, and Durability Tips
- Build Your Concert Kit With Hot Takes Designs
- Frequently Asked Questions
Start With the Right Base: Lightstick Models and Material Compatibility
Designing custom K-pop lightstick covers and accessories starts with one hard truth: not every lightstick takes the same treatment. A plastic shell, an acrylic globe, and a silicone band each respond differently to glue, heat, and pressure.
Fans can match their materials before they buy a single supply.
Here's the good news: most lightsticks fall into three build types, and each one has a clear path.
Plastic, Acrylic, and Silicone: What Sticks to What
- Hard plastic shells: Most common on older models. Smooth, slightly oily, and picky about adhesive. Needs a light sanding or a primer wipe.
- Acrylic globes: Clear, glossy, and easy to scratch. Vinyl and decals work well here, but harsh solvents cloud the surface.
- Silicone bands and grips: Flexible and grippy. Glue does not bond to silicone, so skip the adhesive and use a fitted cover or a strap instead.
A quick test saves heartbreak. Press a small piece of your chosen tape or vinyl to a hidden spot and leave it for a day. If it lifts, your material is telling you something.
DIY K-Pop Lightstick Decoration Ideas That Actually Hold Up
The best DIY K-pop lightstick decoration ideas share one thing: they work with the light instead of blocking it. A lightstick that glows through a thin cover looks magical.
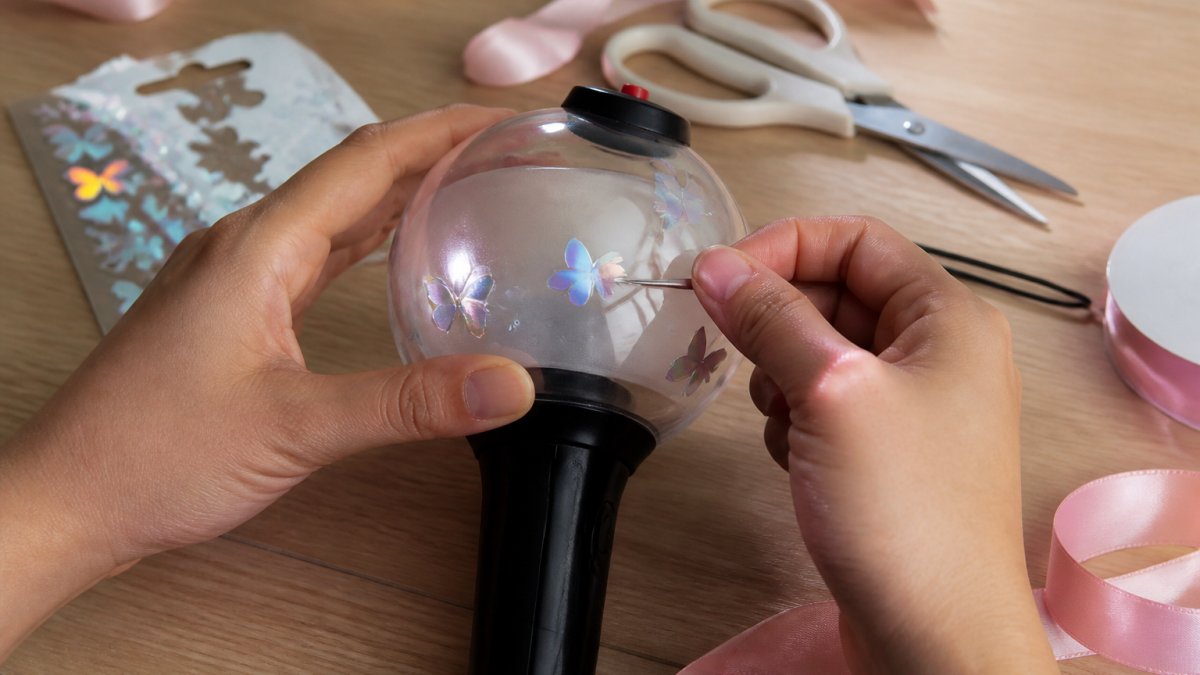
That's the whole game. Keep the light visible and the decoration secure.
Decals, Holographic Vinyl, and Acrylic Globes
Holographic vinyl is the crowd favorite for a reason. It catches stage lights and turns a plain globe into something that shifts color as you move. The trick is a clean surface and a steady hand.
- Clean first: Wipe the globe with rubbing alcohol and let it dry fully.
- Go slow: Peel the backing a little at a time and smooth as you go.
- Skip the bubbles: A credit card edge works better than your fingers.
Acrylic globes take vinyl beautifully, but they scratch if you rush. Keep a soft cloth under the piece while you work.
Best Adhesives for Lightstick Crafts (and What to Avoid)
Finding the best adhesives for lightstick crafts comes down to one rule: use something removable until you're sure. Permanent glue on a lightstick is a one-way street, and you'll regret it if the placement is off.
Here's how the common options stack up.
| Adhesive | Best For | Watch Out For |
|---|---|---|
| Double-sided craft tape | Vinyl, light decals | Weakens with heat and sweat |
| Glue dots | Small accents, bows | Can leave residue on acrylic |
| E6000-style craft glue | Plastic shells, 3D parts | Strong fumes, permanent hold |
| Hot glue | Ribbon, fabric wraps | Melts in a hot car, can warp thin plastic |
Watch out: superglue and acetone-based cleaners fog acrylic and can crack thin plastic. Keep both away from your globe.
Test every adhesive on a hidden spot first. A five-minute test beats a ruined lightstick.
Crochet Lightstick Cover Patterns for a Handmade Look
Crochet lightstick cover patterns give you something glue never can: a soft, snug fit that stretches on and off. They're also the most forgiving option for beginners, because yarn hides small mistakes. But the difference between a cover that looks handmade and one that looks homemade comes down to gauge, yarn weight, and how you handle the opening for the light.
Start With Gauge, Not the Pattern
Most lightstick covers are worked as a tube, and the tube only fits if your gauge matches your lightstick's circumference. Before you chain a single stitch, measure around the widest part of the globe or shell with a soft tape measure.
A common pattern for a standard lightstick globe runs roughly 40 to 48 stitches around in worsted-weight cotton on a 4.0 mm hook, but that number swings with yarn weight and tension.
Stray Kids Pride Compass Bandana | Rainbow Nachimbong STAY K-Pop Concert Scarf →
The Basic Tube, Step by Step
- Magic ring or chain start. A magic ring closes the base cleanly; a chain start is easier for beginners but leaves a small gap. Either works.
- Work single crochet in a spiral. Skip the join-and-chain if you want no seam. Place a stitch marker at the first stitch of each round so you can count.
- Increase for the globe, straight for the handle. Most lightsticks are wider at the top than the handle, so add a few increase rounds near the base, then work even.
- Check fit every four to six rows. Slide the work-in-progress onto the lightstick. If it drags, go up a hook size; if it bags, go down.
- Leave the top open. The light needs an unobstructed path out. A closed top turns a glowing globe into a dim lump.
- Add a drawstring at the base. Chain a cord, thread it through the last round, and tie it off so the cover stays put during a show.
Yarn Choice Changes Everything
- Cotton and cotton blends: Hold shape, breathe, and resist stretching out over a long concert. The default choice for most covers.
- Acrylic: Cheaper and available in every fandom color, but it pills and stretches. Fine for a display piece, less ideal for a three-hour show.
- Wool: Warm and springy, but it felts with sweat and friction. Skip it for concert use.
Use a hook one size smaller than the yarn label recommends if you want a denser fabric that blocks light less evenly but holds its shape better. Go up a size if you want a looser, drapier cover that lets more light through.
Fit Adjustments for Common Lightstick Shapes
- Globe-topped lightsticks: Increase rounds near the top, then work a few even rounds to hug the globe.
- Cylindrical lightsticks: Work even from the base up, with a drawstring at both ends if the cover tends to slide.
- Handle-heavy designs: Add a separate small sleeve for the handle so the globe cover stays independent.
Most covers take an evening to finish in worsted weight. Make one in each era's colors and swap them between shows, that's the real advantage crochet has over glue.
Bows, Ribbon Accents, and 3D Printed Components
Bows and ribbon accents are the fastest way to make a lightstick look intentional. A simple satin bow near the handle adds polish in minutes. Clip-on bows are even better, because you can swap colors between shows. But the real depth gap in most lightstick guides is 3D printing: competitors show finished printed parts without explaining how to make one that survives a concert.
Bows and Ribbon: The Five-Minute Upgrade
- Satin ribbon, 1 to 1.5 inches wide: The standard for a reason. It holds a bow shape, catches stage light, and comes in every fandom color.
- Clip-on bows: Attach to a handle ring or a crochet cover with an alligator clip. No adhesive, no residue, swappable between shows.
- Ribbon wraps: Wrap the handle in ribbon and secure the ends with a small piece of double-sided tape, then cover the seam with a bow. Avoid hot glue on thin plastic handles, it can warp the shell.
Test any clip or wrap by shaking the lightstick gently. If the bow shifts, add a second clip or a small piece of grip tape under the ribbon.
3D Printing: What Actually Survives a Show
3D printing opens up a different level. Fans with access to a printer make custom rings, caps, and charms that snap onto the handle. The key is material choice and print orientation, not just the filament name.
- PLA: Easy to print and dimensionally accurate, but it softens in a hot car and gets brittle in cold weather. Fine for indoor display pieces, risky for a summer stadium show.
- PETG: Tougher and more heat-resistant than PLA, with a slight flex that helps snap-fit parts. The better default for concert-day add-ons.
- TPU: Flexible and grippy, good for grips and bumpers that need to flex around a handle. Harder to print on a stock machine, so most beginners outsource it.
Print Settings That Matter for Lightstick Parts
- Wall count: Use at least three perimeters. Thin walls crack at the layer lines when a part is clipped on and off repeatedly.
- Infill: 20 to 30 percent is enough for small rings and charms. More infill adds weight without adding strength at this scale.
- Orientation: Print snap-fit rings flat so the layer lines run around the circumference, not across the snap. A part printed upright will split along the layers the first time it flexes.
Attaching Printed Parts Without Damaging the Lightstick
- Snap-fit rings: The cleanest option. No adhesive, removable, and the part can be reprinted if it cracks.
- Silicone bands: Wrap a printed charm onto a silicone band rather than gluing it to the shell. Silicone doesn't bond to glue anyway, and the band spreads the load.
- Removable adhesive: If you must glue, use a removable craft adhesive and test it on a hidden spot first. Permanent glue on a lightstick is a one-way street.
Print small and light. A heavy add-on makes the lightstick top-heavy and annoying to wave for three hours, and it puts more stress on the joint every time you swing it.
If you want more ways to finish the look, our guide to K-Pop concert outfit accessories covers the accents that pair with a decorated lightstick.
Step-by-Step Assembly for Beginners
First-timers can build a solid custom lightstick in about an hour with a few basic supplies. Here's the order that keeps mistakes low.
- Pick your base. Confirm whether your lightstick is plastic, acrylic, or silicone.
- Clean the surface. Wipe with rubbing alcohol and let it dry completely.
- Plan the layout. Hold decals and ribbon in place before sticking anything down.
- Apply the main decal. Start at one edge and smooth toward the other.
- Add accents. Bows, charms, and small vinyl pieces go on last.
- Test the glow. Turn the light on and check that the design still shines through.
- Do a shake test. Gently wave it and confirm nothing shifts.
Watch out: applying decals in a cold room makes vinyl stiff and prone to peeling. Work somewhere warm and take your time.
Concert Safety, Transport, and Durability Tips
A decorated lightstick has to survive a real show: crowds, heat, sweat, and a long ride home. A few habits keep it in one piece.
- Check venue rules first. Many venues limit bag size and ban outside items, so confirm before you pack.
- Carry it in a bag, not loose. A stadium-friendly option like our retro BTS drawstring backpack keeps your lightstick and essentials secure.
- Avoid the trunk. Heat warps plastic and softens glue. Keep your gear in the cabin.
For the full festival look, our custom K-pop festival wear styling tips walk through building an outfit that works with your gear. And if you want a matching accessory, our Stray Kids Pride Compass bandana doubles as a lightstick decoration or wrist wrap.


Build Your Concert Kit With Hot Takes Designs
The hardest part of a custom lightstick isn't the craft. It's making sure the rest of your concert kit lives up to it. A show-stopping lightstick next to a plain tee is a missed opportunity.
Hot Takes Designs offers custom-printed apparel and lifestyle products for fans who refuse to blend in. We make gear for K-Pop concerts, BookTok fits, and anyone chasing a main character look.
View all.
Frequently Asked Questions
What materials are best for DIY K-pop lightstick covers?
For a cover that lasts through a concert, reach for stretchy cotton or acrylic yarn if you crochet, permanent vinyl for decals, and E6000 or a strong double-sided craft tape for attaching accents. Avoid hot glue on the globe itself because heat can cloud acrylic. Test any adhesive on the handle first, and keep decorations off the LED panel so the light still reads clearly in the dark.
How do you attach decorations to a lightstick without damaging it?
Work in removable layers. Wrap the handle in ribbon or a crochet sleeve first, then attach bows, charms, or 3D printed clips to that wrap instead of the plastic. For flat decals, use vinyl with a low-tack backing and press gently. Skip superglue and acetone-based cleaners, which can melt or fog the plastic, and never cover the battery compartment or the button.
Are there specific patterns for crocheting lightstick covers?
Yes. Most crochet lightstick covers use a simple tube pattern: a magic ring, then continuous single crochet in the round until the sleeve fits the handle, with a drawstring or ribbed cuff at the top. Measure your lightstick's handle circumference first, since models vary. Worsted-weight cotton yarn holds shape better than acrylic and keeps the cover from sliding during the show.
How can I make my lightstick stand out at a concert?
Layer a few small details instead of one big one: a crochet sleeve in your fandom colors, a ribbon bow at the base, and a holographic decal on the globe. Add a beaded charm or a bandana tied around the handle for extra texture. Keep it lightweight so you can hold it for three hours, and check your venue's bag and prop rules before you go.
